Overall I think that all of our hard work paid off. We have created a piece of work that I am proud of. I think the piece fits together nicely. I was very impressed with the end outcome, I did not think it was going to look as good as it does due to the fact that it was our first ever time compositing CG into real life footage.
I learnt a lot in this project I developed my modelling skills, my UV mapping and texturing skills. I learnt more about after effects and maya. I learnt more about rendering and I learnt about green screen. I learnt an awful lot and I think that this unit was extremely beneficial. I can now take these skills and improve and develop them.
If I were to do the project again then I would liked to have used our own model. It wasn't a big deal that we didn't this time round, it just would have been another extra touch from us. Despite starting early I still think that we could have been a little bit sharper with the mini deadlines that we set ourselves. But then again it couldn't be helped as there were some things that took longer than expected. Such as UV mapping the monster model for example. I think the projects before helped me to be a lot more prepared for this project which put me in good stead. Overall I am very happy with the outcome of this project and look forward to the next one!

Sunday 27 March 2011
Compositing
So now I had my two shots rendered it was time to composite them. I did this in after effects. For shot 7 I imported the footage, found where abouts the shot was within the footage, I then imported the tiff sequence of the bin with its shadow, the tiff sequence with monster and its shadow and finally the mental ray tiff sequence of the bin and the monster. Making sure that it was placed at the correct place of the footage.
It was key that I got each item in the right place. The bottom layer is the footage, the second from bottom layer is the bin with its shadow, the third from bottom layer is the monster with its shadow and the top layer is the mental ray tiff sequence of the bin and the monster.
I then changed the opacity of the shadows to making them both lighter and keep the bins shadow slightly darker than the shadow from the monster. With changing the opacity of the shadows I found that subtlety was the key.
I then added an Gaussian blur to the shadows, so that they didn't look so defined. Then to the mental ray tiff sequence of the bin and the monster I added the effect CG force motion blur, this would add more realism to the movement of the bin and the monster in the shot.
It was then just a case of tweaking the opacity, the Gaussian blur and the CG fore motion blur in order to create the most realistic effects. I used the shadows that were already cast in the footage and the motion blur that appears from the Parkour character in the footage as reference. This helped me to get the shadows and motion and Gaussian blur just right. Once I was happy with everything it was them time to render.
I then did exactly the same process for shot 8, except all I had to do this time was change the opacity of one shadow, and add Gaussian blur to it, and then add CG force motion blur to the mental ray tiff sequence of the bin. Again tweaking it afterwards so that it fitted with the real life footage and then rendering it out once finished.
Below are some images that show how I composited the shots in after effects.


Below are images of the render settings that I used for rendering out with after effects. Rendering took a very long time!


Below is the video of my completed composited shot 7.
Below is the video of my completed composited shot 8.
Overall I am extremely happy with how the two shots that I composited turned out. I think that the CG fits in fairly well with the real life footage and looks a lot better than I initially thought it would.
Final Render
Now we have tweaked and improved everything and got it to a standard that we are happy with its time to do our final render. We each picked 2 shots that we are going to render and then composite. The two shots that I chose are shot 7 and shot 8. I chose these shots because they include the dustbin that I modeled. Shot 7 is where the creature acknowledges the bin and throws it at the camera and shot 8 is when the bin goes flying towards the Parkour character and he dives out of the way.
For shot 7 I am going to be doing 3 renders. The first render will be just the bin and its shadow using maya software. The second render will be just the monster and its shadow again using maya software. The third render is going to be the bin and the monster using mental ray. We found that mental ray made the shadows go a little strange, so maya software did the job just fine. Mental ray will render the bin and monster out in a much better quality, after all we want the quality to be as best as it possibly can in order for the monster and the bin to look like they actually exist in the filmed environment. The reason I am doing 3 renders for this shot is because the shadow that comes from the bin needs to be darker than the shadow that comes from the monster, 3 renders will give me the option and allow me to changing the opacity of each shadow when compositing.
Of course I rendered out the bin and monster with and without their shadows at first and then realized this and had to redo the renders. I also had to download a hotfix for maya because the foot of the monster in the animation was going crazy. This then meant that I had to redo the mental ray render of the bin and the monster. So rendering wasn't quite smooth sailing at first.
For shot 8 I am going to be doing 2 renders. The first render will be the bin with its shadow and I will be using maya software. The second render is going to be the bin without its shadow using mental ray.
Below are images of the maya software render settings that I used and the metal ray render settings that I used.
Maya Software Render Settings Used:


Mental Ray Render Settings Used:


So now the rendering is complete it is time to start compositing!
For shot 7 I am going to be doing 3 renders. The first render will be just the bin and its shadow using maya software. The second render will be just the monster and its shadow again using maya software. The third render is going to be the bin and the monster using mental ray. We found that mental ray made the shadows go a little strange, so maya software did the job just fine. Mental ray will render the bin and monster out in a much better quality, after all we want the quality to be as best as it possibly can in order for the monster and the bin to look like they actually exist in the filmed environment. The reason I am doing 3 renders for this shot is because the shadow that comes from the bin needs to be darker than the shadow that comes from the monster, 3 renders will give me the option and allow me to changing the opacity of each shadow when compositing.
Of course I rendered out the bin and monster with and without their shadows at first and then realized this and had to redo the renders. I also had to download a hotfix for maya because the foot of the monster in the animation was going crazy. This then meant that I had to redo the mental ray render of the bin and the monster. So rendering wasn't quite smooth sailing at first.
For shot 8 I am going to be doing 2 renders. The first render will be the bin with its shadow and I will be using maya software. The second render is going to be the bin without its shadow using mental ray.
Below are images of the maya software render settings that I used and the metal ray render settings that I used.
Maya Software Render Settings Used:


So now the rendering is complete it is time to start compositing!
First Render
For the sound of our piece we are using a fellow student from one of the sound courses at Ravensbourne. He gave us an estimate of how long he needed in order to complete the sound in time for the deadline of the project. Despite not quite having reached a completed standard it has come round to the time when the sound student needed the footage so that he could create the sound. This meant we had to render everything out and create a ruff composite that would allow the sound student to create sounds and a soundtrack that will correspond with the footage.
So we distributed the shots between us and rendered them out, I rendered out shot 8. I came across the problem when rendering that there was a black background, after lots of trial and error it was finally discovered that the image plan that was attached to the camera needed to be deleted. After overcoming this problem shot 8 was then finally rendered. We managed to get everything rendered out and finished the ruff composite just in time to hand to the sound guy.
The next stage is to improve everything and get it to that completed standard, we will then re render and composite the CG with the real life footage.
3D Blockouts
The next stage was to create 3D blockouts of the objects and the environment from the shots that the monster is going to be in. We need to do 3D blockouts so we can get the lighting and shadows to resemble the lighting and shadows from the scene. This will make it feel as though the monster and the props actually exist in the environment. These 3D blockouts will then be given to Matt so that he can work on the lighting of the scenes. Nat gave us a link to two compositing tutorials that helped to explain the 3D blockout process, the tutorials show you how it should be done. Below is a link to the two tutorials.


We then selected some shots to do the 3D blockouts for. I chose to do shot 8, shot 11 and shot 12. I then opened up maya, created a camera and attached an image plane with the footage on it. I then went through the footage until I got to one of the shots that I needed to do a 3D blockout for and began. I positioned planes to resemble the angles and shapes of the environment of the shot. I did this for each of the 3 shots that I selected. Below are images of the shots and the 3D blockouts that I created for them.
Shot 8


Above is an image of the 3D blockout for shot 8 in perspective view

Above is an image of the 3D blockout for shot 8 in camera view
Shot 11


Above is an image of the 3D blockout for shot 11 in perspective view

Above is an image of the 3D blockout for shot 11 camera view
Shot 12


Above is an image of the 3D blockout for shot 12 in perspective view

Above is an image of the 3D blockout for shot 12 in camera view
Change of Plan
Unfortunately we were now running out of time and Will needed to start animating. However there were problems with the rig of the monster model and we did not have time to fix it as we needed to get cracking straight away. So we decided the best way around this minor set back was to use a pre-made model that comes with its own textures and fully functional rig. Although it may now seem that all my hard work of UV mapping the monster model now counted for nothing have no fear because I thoroughly enjoyed the process, I learnt a lot and gained some vital experience in UV mapping.
Will found a pre-made monster model from the creative crash website. The model is called creature and it will fit in perfectly with the footage and storyline that we currently have. Below is an image of the Creature model.

Now all problems had been resolved we could finally move onto the next stage of the project.
Filming The Final Scene
We have now filmed the bulk of our footage, however we've still got to film the final scene and the green screen scene. So on the agenda today the 24th February 2011 we filmed our final scene with Jared. We filmed the green screen scene on the 8th March 2011. Now we finally have all of our footage. Its time to get everything into gear so that we can start compositing.
Thursday 17 March 2011
Modelling The Dustbin
Next I was assigned the task of creating another prop from our piece. Basically near the beginning of the scene the monster picks up a dustbin and throws it at the Parkour character. So I needed to create a dustbin. Nat was originally going to create the bin but she had her hands full with other pieces of work so I offered to take over. I used the images that Nat took as reference for creating the bin. She took these photo's of a dustbin from the area when we went filming. Below are the reference images that I used.


I then began modelling, I am very happy with how the final model turned out. It was very important that I got the model to look realistic as it needs to match the footage as best as possible. I found modelling the handles quite challenging at fist and I could only faintly remember a few techniques so I used a two part tutorial to help refresh my mind and help me to create the handles of the bin. Below are two links to the two part tutorial.
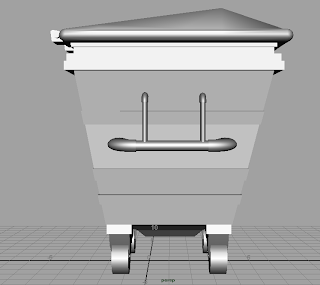
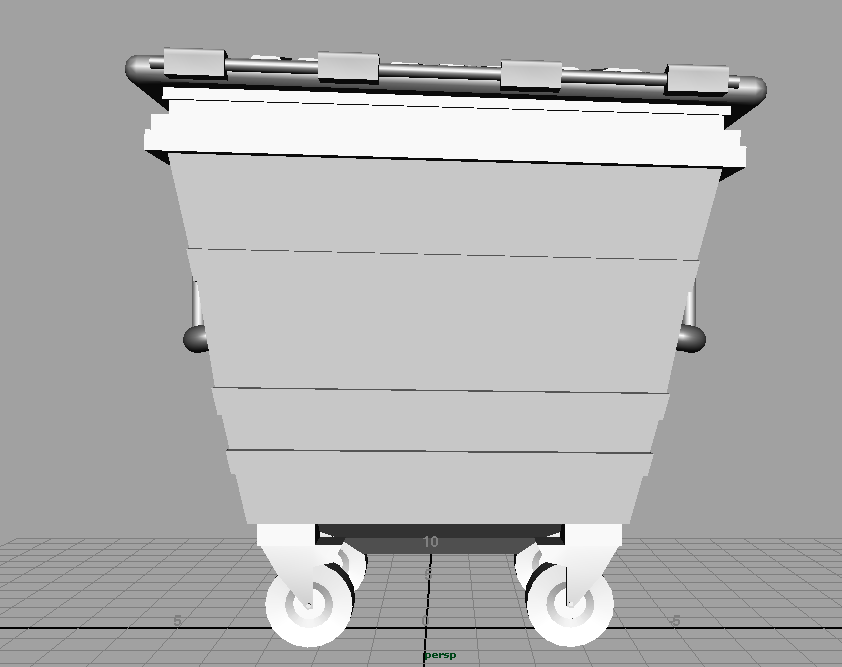
So after spending a lot of time on creating the model it was finally done. Below are images of the finished model of the dustbin.

Front View

Side View Left

Side View Right
Back View

Bottom View

Top View

Perspective View
The next step was to UV map the dustbin model so that I could texture it. It was key that I got the UV map good enough in order to apply the texture well enough to make the bin look as realistic as possible. Below is an image of the UV layout before I UV mapped the bin.

I then used automatic mapping to UV map the bin, below is an image of what the UV layout looked like after automatic mapping it.

As you can see this looked a lot better however there were still hundreds of pieces and some were extremely miniscule. All these pieces needed to be sewn together to create shells that clearly resembled parts of the bin. This is so I could clearly see what part of the bin I was texturing. After a very long process of going through all of the pieces and sewing them to their correct partners, I had finally finished UV Mapping. Below is an image of the finished UV Layout of the bin. I'm very happy with how the UV layout turned out especially as I put so much time and effort into it. I think that everything is laid out very well and you can clearly see what part of the bin each shell represents.

So the next step was to texture the bin. I did this by taking a UV snapshot of the UV layout of the bin (as seen in the image above) and opened it in photoshop I then applied the textures. Originally I was going to take the textures from the pictures of the actual bin that I used for reference, however I found this was not the best way as it caused the bin to loose its realism. So I then got my textures from images from google. Below are the images of the textures.

Above is an image of the dark metal texture that I used for the body of the bin.

Above is an image of the dark silver metal that I used for the wheel holders.
Above is an image of the black rubber texture that I used for the wheels of the bin.
Above is an image I used for the texture of metal inside of the bin's wheels.
I decided that these textures made the bin look a lot better. I compared my textured model to the images that I took of the real bin and decided the bin looked too dark. So I went back into photoshop and tweaked the textures. Below are the images of the edited textures that I used.

Above is an image of the dark metal texture that I used of the model bin. It differs from the original image because its cut closer to the lighter bit in the centre.
Above is an image of the light metal texture used for the inside of the bin's wheels. I edited it by applying a darker silver over the top just to give it some life.

Above is an image of the darker silver metal texture that I used for the wheel holders of the bin. I edited this by painted some patches of dark silver over the top. This made the wheel holders look more realistic.
Below is an image of the finished UV snapshot with the textures.

I had now finally finished the bin, below are images of the finished bin.

Front View

Side View Left

Side View Right

Back View

Bottom View

Top View

Top Perspective View

Perspective View
Overall I am very happy with how the dustbin turned out. I think that my hard work paid off. If I were to do it again I would add more detail to the texture. Such as the logo's and writing that is on the actual bin form the reference images. I tried to do this when texturing this bin but I could not quite get it right as the UV layout needed editing again. This meant i needed a lot more time, if I were to put these extra additions onto the texture. Unfortunately I didn't have the time to solve this problem as Will needed the bin so he could animate. So I had to leave the bin as it was in order to remain on track and move on to the next stage of the project.
Subscribe to:
Posts (Atom)